Ensuring you get the best out of your Tile Levelling System is essential for not only a flawless finish but also for safety reasons. Getting that uniform appearance across your tiles ensures consistency and makes the grouting process as smooth as possible. Professionally installed tiles are more likely to withstand daily wear and tear and helps reduce the risk of cracks and breakages. Uneven tiles can further create lippage, resulting in a tripping hazard you might not expect.
When it comes to the longevity of your floor or wall tiles, ensuring they are aligned correctly with protect the floors beneath/behind your tiles. Precise tiles and sealed grout lines will prevent water from seeping behind your tiles in a shower or wet room, reducing your risk of water damage and mould.
We have outlined one of the best tile levelling systems that we stock at Tilers Gear below so you can find the system with ease, because at Tilers Gear, we know how important it is to get the best, seamless finish.

The Wedge Tile Levelling System
The Wedge Tile Levelling System is an essential toolset for professional tilers and those looking to do a DIY installation. It ensures that your tiles are laid flat, evenly spaced, and securely bonded to the adhesive. The tile levelling system's components work together to prevent tiles from shifting and to achieve a seamless, level finish.
Key Components
- Levelling Clips:
- Function: Placed beneath tiles at intersections to maintain even height and spacing.
- Use: Inserted between tiles during installation to hold them securely in place.
- Levelling Wedges:
- Function: The tile levelling wedges is placed into clips to create tension and help level the adjacent tiles.
- Use: The levelling wedges are pushed into the tile levelling clips after tile installation to apply pressure, ensuring tiles remain level and without lippage.
- Setting Pliers:
- Function: Setting pliers are a specialised tools for tightening or removing wedges.
- Use: Used to adjust the tension of wedges, ensuring they are snug against the tiles, and to remove wedges once the adhesive has set and there is no longer any movement in the tiles.
Benefits of the Wedge Tile Levelling System
- Prevents Lippage: By keeping tiles at the same height, the system prevents uneven surfaces and reduces the risk of tripping.
- Ensures Uniform Spacing: Clips ensure that tiles are evenly spaced, which is crucial for aesthetic consistency and grout line uniformity.
- Improves Adhesion: The system ensures tiles are firmly pressed into the adhesive, collapsing the ridges correctly and enhancing the bond.
- Results in a Professional Finish: By maintaining a level surface, the system helps achieve a high-quality, professional-looking finish.
Tips for Best Results
- Consistent Clip Placement: Place clips at regular intervals to ensure uniform spacing and levelling.
- Adequate Pressure: Apply consistent pressure with the wedges to avoid over-tightening or under-tightening, which could affect the tile alignment.
- Check Regularly: Frequently check the level of tiles during installation to catch any issues early.
- Follow Adhesive Cure Times: Ensure the adhesive has fully set before removing clips and wedges to maintain tile positioning.
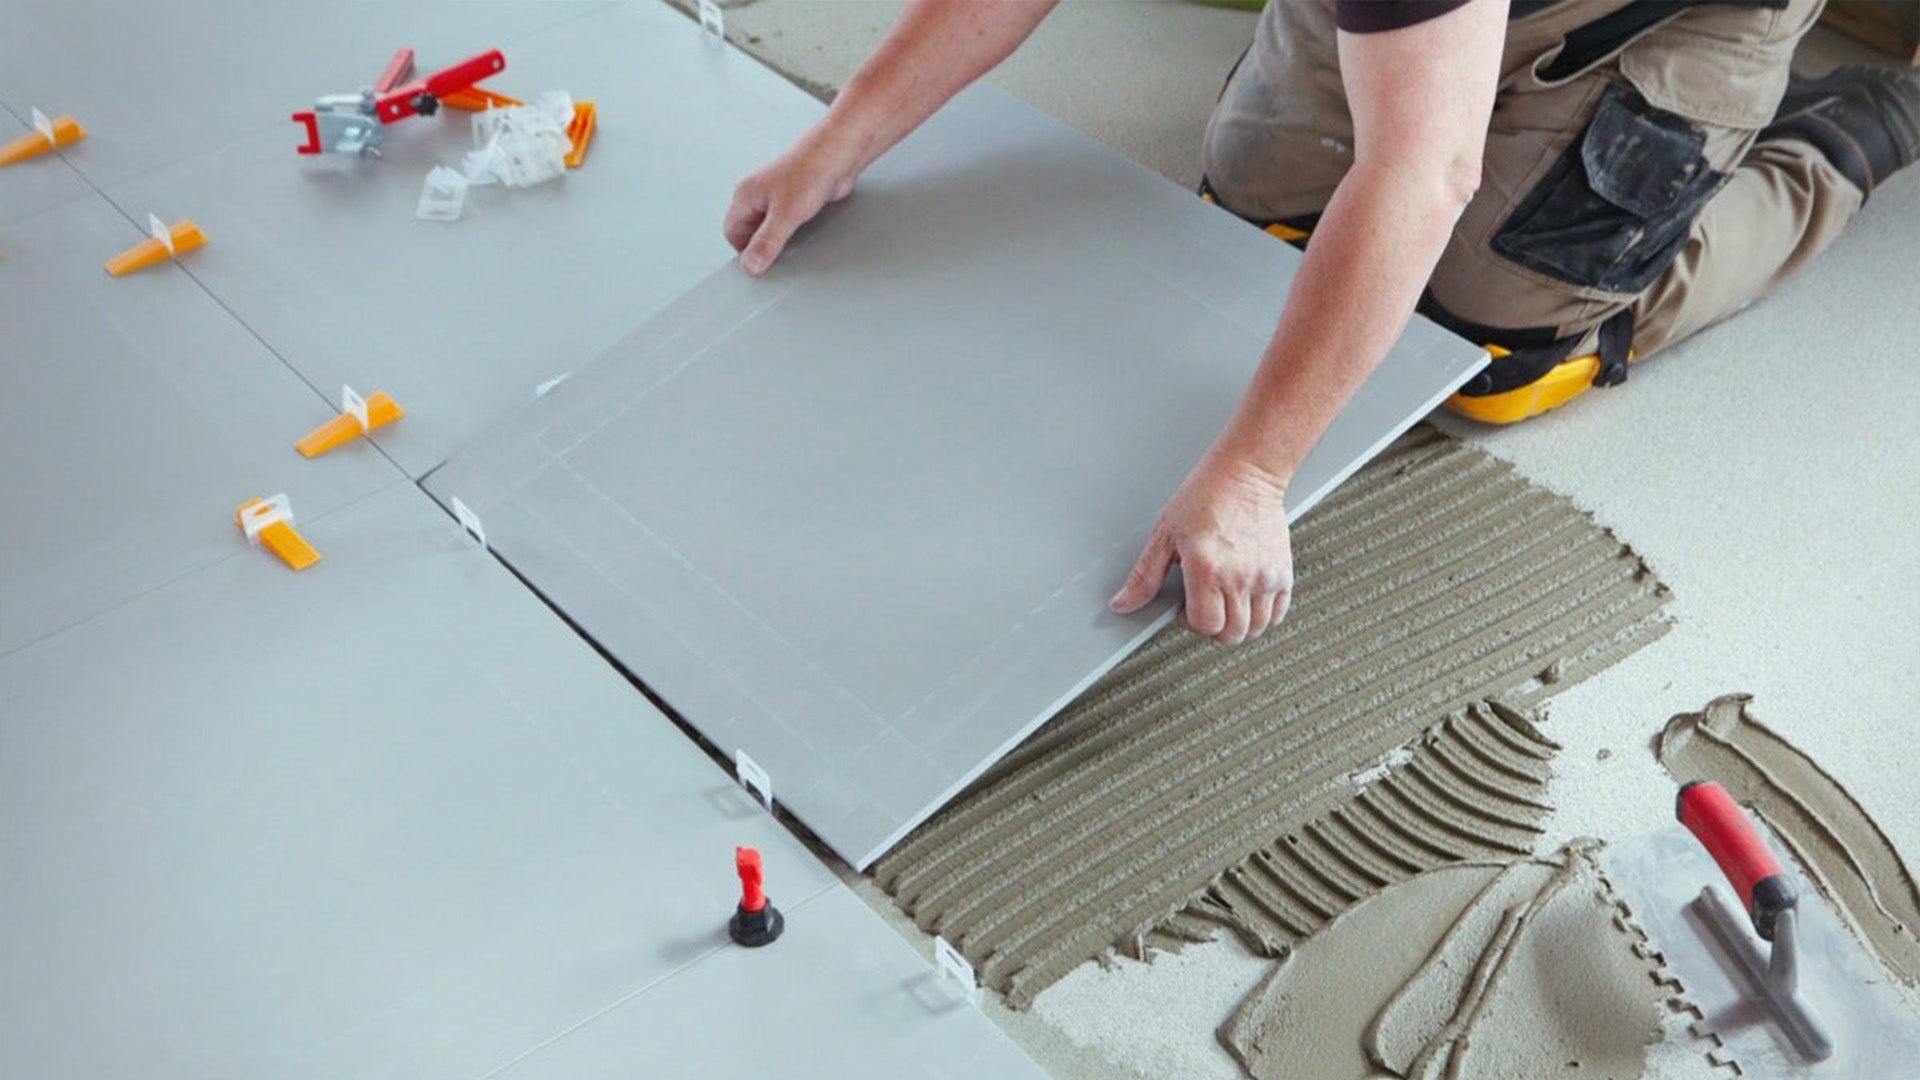
How to Use the Wedge Tile Levelling System
- Place Levelling Clips: Once you begin to lay your tiles, insert clips under the tiles at the corners or along edges, depending on your tile size and layout.
- Install Tiles: Lay the adjacent tiles over the clips which you have already aligned on the tile laid first, ensuring they are properly aligned.
- Insert Levelling Wedges: Push the levelling wedges into the clips by hand, being sure to apply pressure to level the tiles.
- Adjust with Setting Pliers: Use a pair of setting pliers to tighten the levelling wedges, ensuring they are secure, and tiles are level.
- Remove Levelling Wedges and Clips: Once the adhesive has set, use the setting pliers to remove the levelling wedges. The clips can then be broken off at the base or removed according to the product instructions.